

Review version: this page follows the locally captured source HTML from top to bottom, including every screenshot position.
As you explore Five Nights at Freddy's: Secret of the Mimic, you'll come across machines that can upgrade your Data Diver, allowing you to enter new locations. However, to upgrade the Data Diver, you need to complete clearance upgrade puzzles.
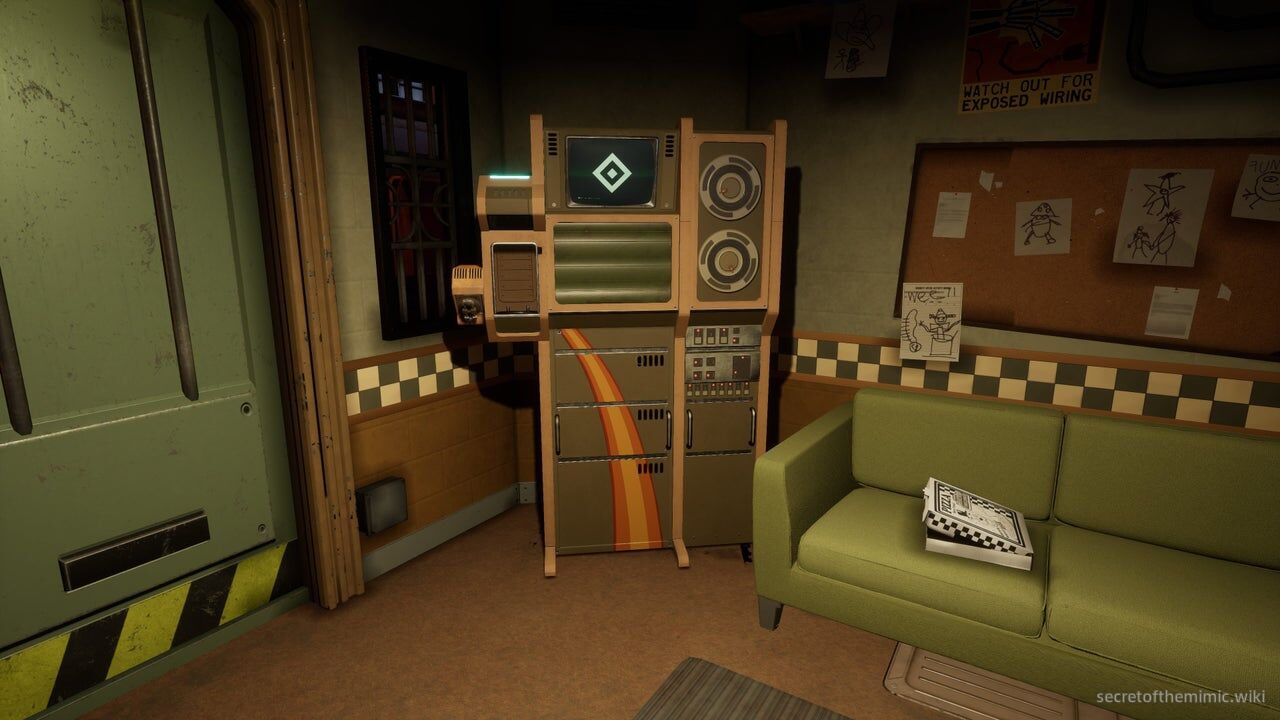
These may seem simple, but they can become quite tricky as the game progresses. So, if you need a hand solving them, we've compiled all the solutions into one handy puzzle guide. Each of these puzzles can also be found in our full walkthrough, so if you want to follow along there for details on where to find them, be sure to check it out.
All Data Diver Clearance Upgrade Puzzle Solutions
If you're looking for a specific upgrade puzzle, we'll link them all below so you can skip through this page to find the one you're struggling with.
How to Complete Data Diver Clearance Upgrade Puzzles
For those wanting a short play-by-play on how to complete these puzzles, let's quickly run through what the objective of these puzzles are and how the rules work. After activating a clearance puzzle, the screen will fill with a three-by-three grid of tiles, with each tile either sporting a 0 or a 1. Your goal is to switch all the 0s into 1s by making the cursor that moves across the screen touch the 0 tiles, transforming them into 1 tiles.
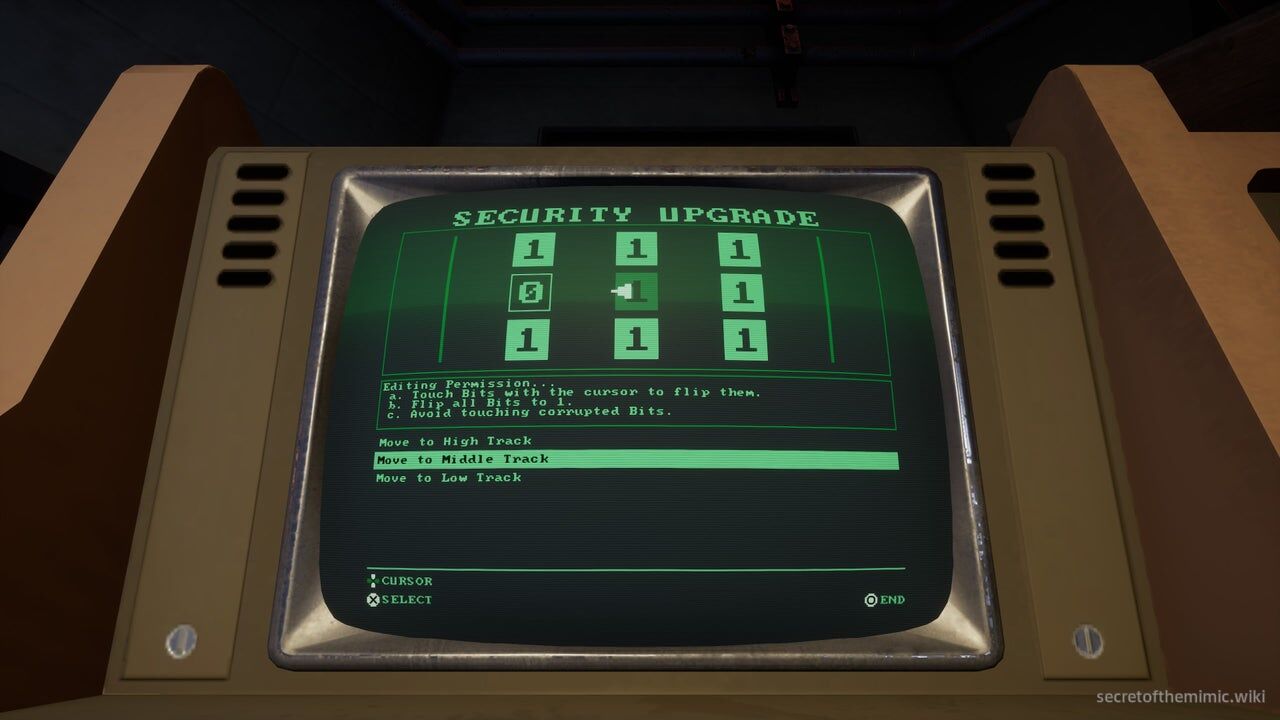
Every time the cursor touches a tile, it'll switch tile type, and while the cursor is moving, you can change the row it's on by using the prompts below the puzzle. You don't have to worry about moving the cursor, as it will move on its own, sweeping from left to right and then right to left automatically. The puzzle must be solved by the time the cursor returns to its original starting point, so you'll need to act quickly to ensure you solve it.
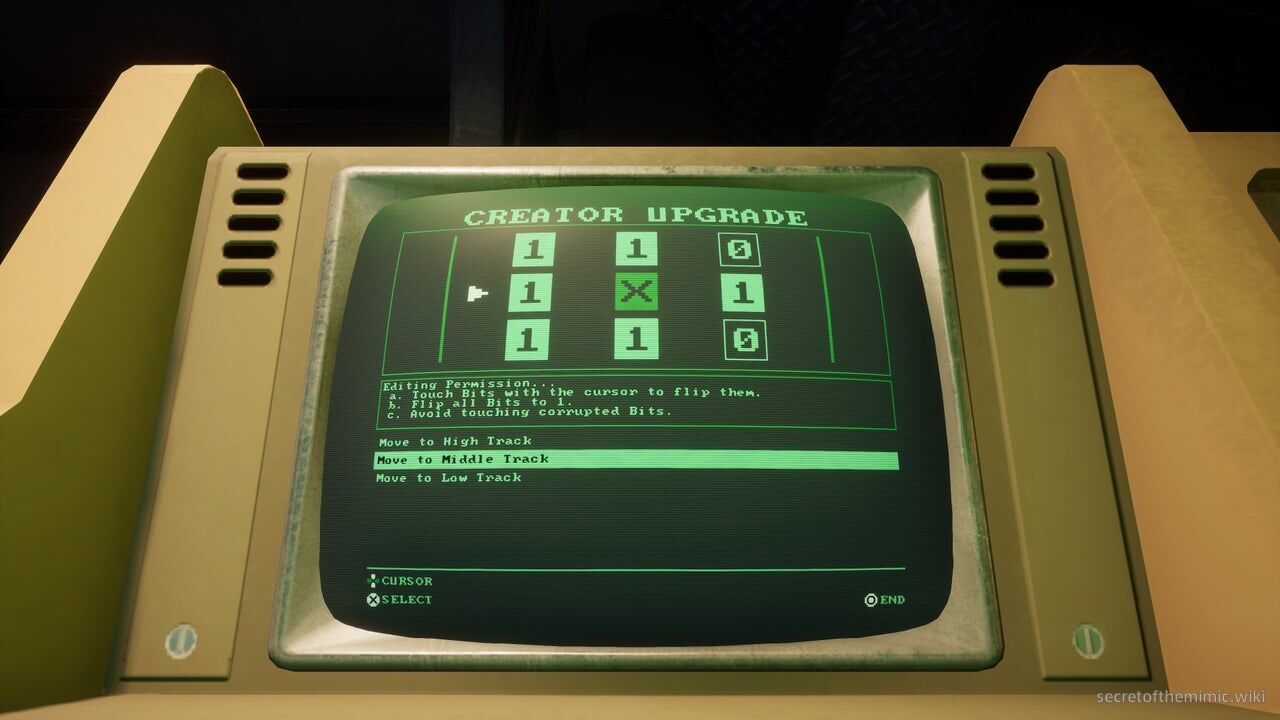
After reaching the Creator Clearance level, the Data Diver will add a new element to the Data Diver upgrade puzzles: Corrupted tiles. These tiles sport an X rather than a 1 or a 0, and if you touch them, you'll fail the mini-game, so you'll want to avoid touching these entirely.
Floor 1 - Security Clearance
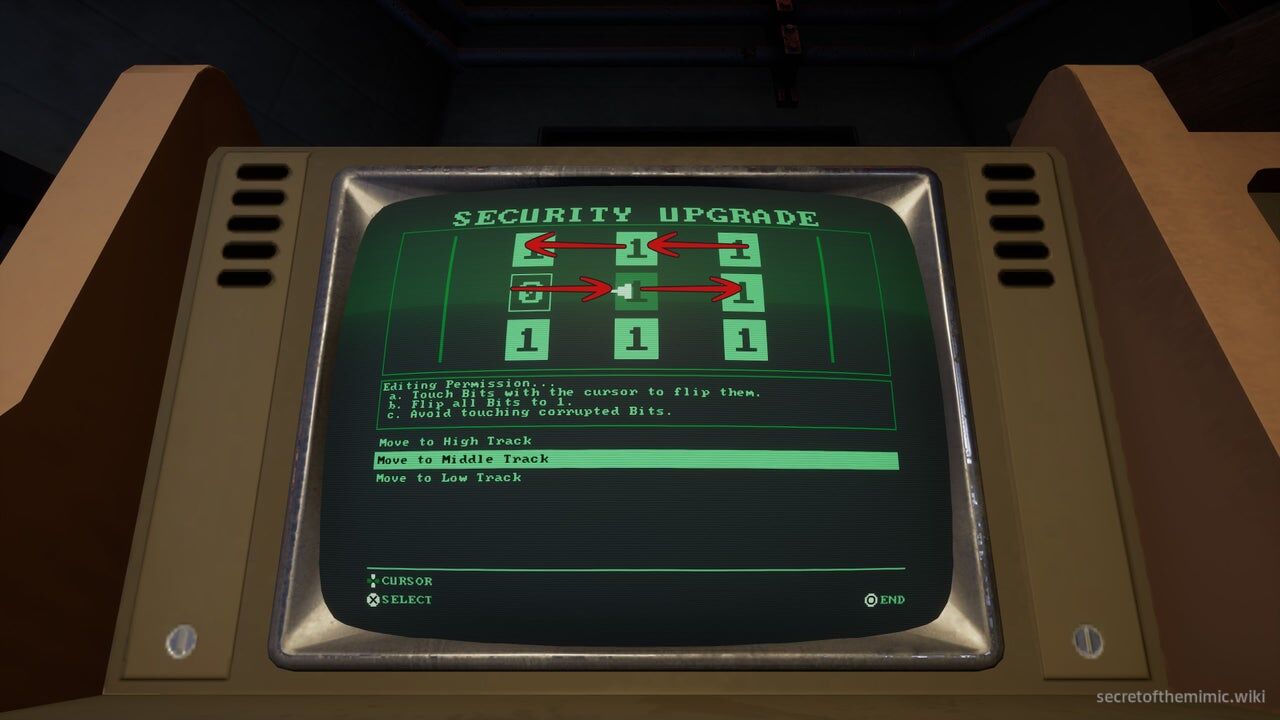
The first puzzle you'll solve is in the Security Room on the first floor. When it loads up, you'll see every tile on the bottom row is a 1, but every tile on the top two rows are 0s. To complete the puzzle, don't touch anything as the arrow moves to the right-hand side and turns the middle row to 1s. As soon as it begins to return to the left-hand side, quickly shift it to the top row so it turns all those tiles to 1s as well. When it's returned to its original position, the puzzle will officially be complete.
Floor 2 - Repair Clearance
Shortly after the first puzzle, you'll find a second clearance upgrade puzzle in the office you visit after arriving on Floor 2, this time for Repair Clearance. The puzzle has 0 tiles in all four corners, while every other tile is a 1. To complete it, we're going to move diagonally, starting from the top left-hand corner and moving down to the bottom right-hand corner.
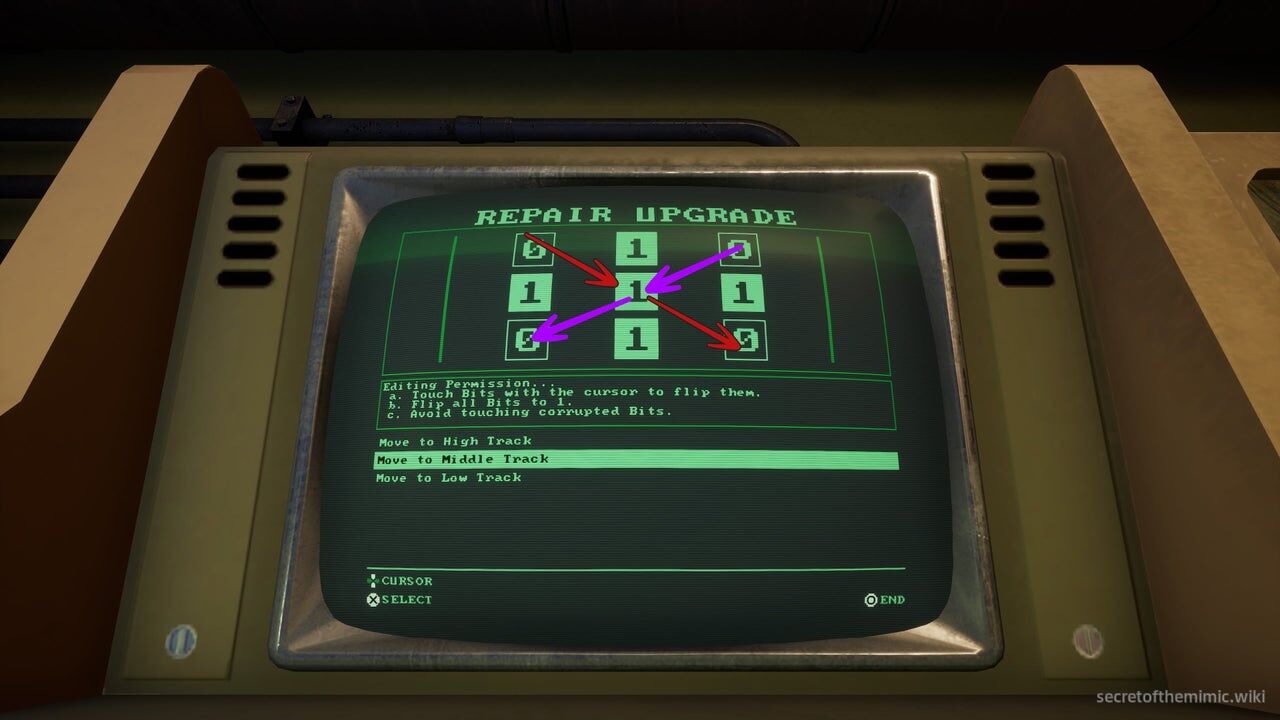
When the cursor turns, simply reverse the initial movement. Lift the arrow to the top right-hand corner and move it down to the bottom left-hand corner. The sequence is shown in the image above, with red arrows indicating the move you should make when the cursor moves right and the purple arrows indicating the move you should make when the cursor moves left.
Floor 2 - Creator Clearance
When visiting the Big Top Showroom, you'll find a Data Diver clearance upgrade machine capable of bestowing Creator Clearance. For this puzzle, we'll see the board has two 0 tiles in the bottom and top right-hand corners, with a corrupted tile in the centre.
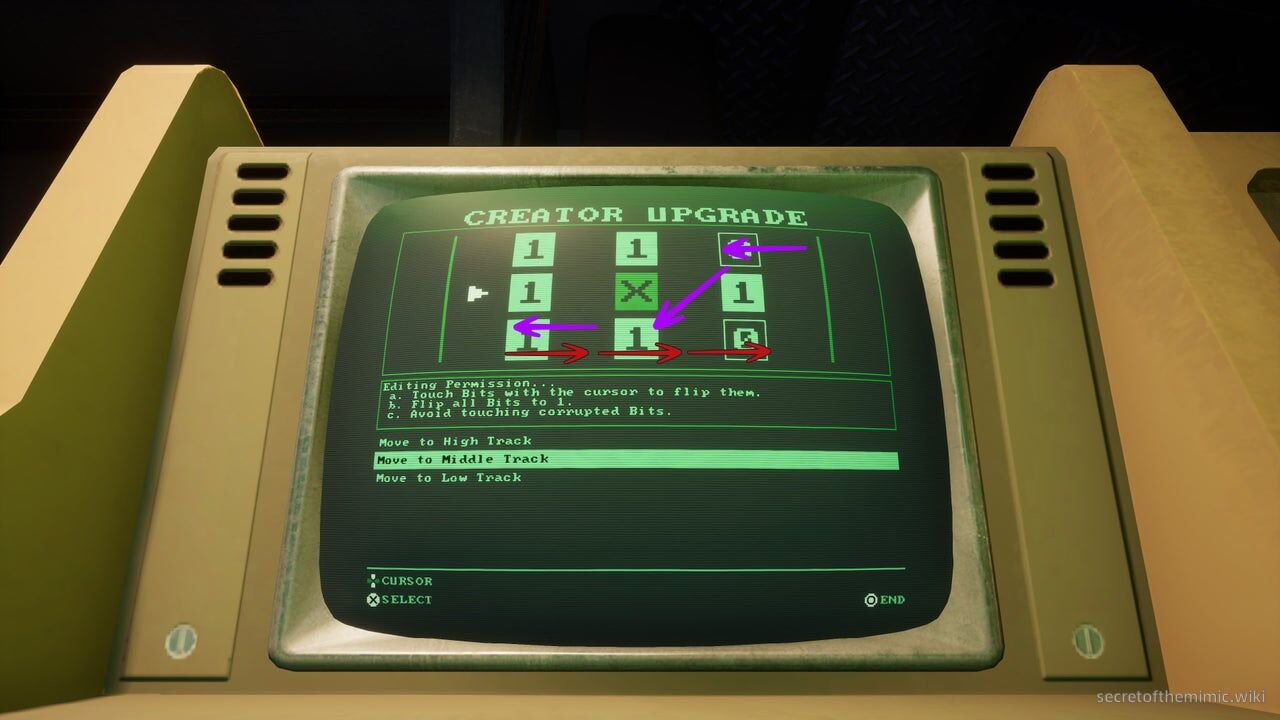
To solve it, we're going to leave the cursor to run across the bottom row, then, when it turns, we'll send it to the top row so it hits the 0 tile in the top right-hand corner before bringing it back down to the bottom row so it changes the two 0s we created back into 1s. The route is shown in the image above, with the red arrows representing the movements you need to make while the arrow moves right, and the purple arrows representing the moves you need to make when the arrow moves left.
Doll Hospital - Admin Clearance
During your forced detour through the Doll Hospital, Arnold will come across the Admin Clearance upgrade machine while battling Dollie. This time around, the puzzle will show two 0s in the top and bottom left-hand corners, two corrupt tiles in the upper and lower middle tiles, and a wall of 0s on the entire right-hand side of the grid.
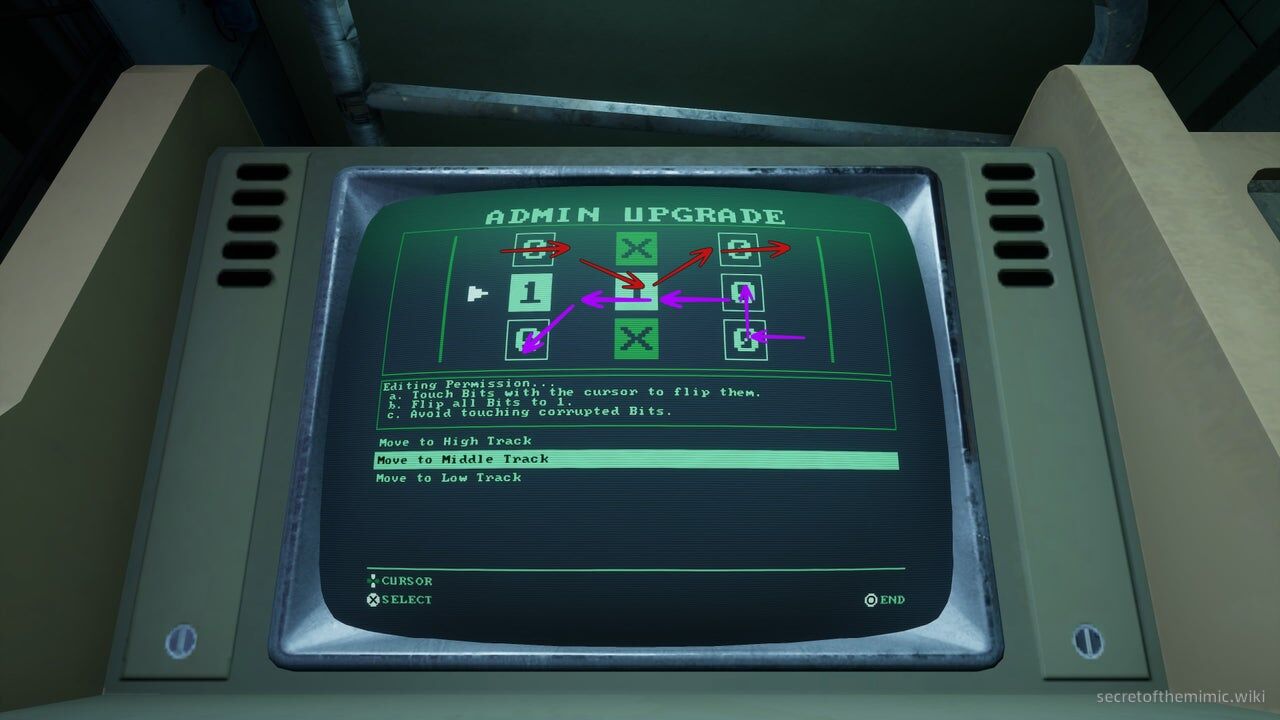
To complete the puzzle:
- Start from the top left-hand corner.
- Switch to the middle row as the cursor moves to the centre of the grid.
- Then, bring the cursor back up to the top right-hand corner when it reaches the right-hand side.
- When the cursor flips, bring it to the bottom right-hand corner tile and then quickly shift it to the middle row so it activates both the 0 tiles on the right.
- Now, move back through the central tile.
- Finally, bring it down to the left-hand corner as it reaches the left-hand side of the grid.
I'll show a diagram above with the correct sequence of movements. Red arrows indicate where to move when the cursor moves right, and purple arrows indicate where to move when the cursor moves left.
Floor 2 - Executive Clearance
While navigating the eerie Admin Wing, Arnold will stumble upon the final clearance upgrade machine after discovering the executive suite. This executive clearance puzzle is the hardest of the bunch. When you pull it up, you'll see it has one corrupt tile in the bottom left-hand corner and a second corrupt tile in the centre. Meanwhile, the middle tile on the left is a 1, and every other tile is a 0. Here's how to solve this one:
- When the cursor starts moving right, let it touch the middle left tile.
- Then, while it's moving through this tile, bump it up to the top row so it turns the upper left tile into a 1.
- From here, let it move all the way to the right.
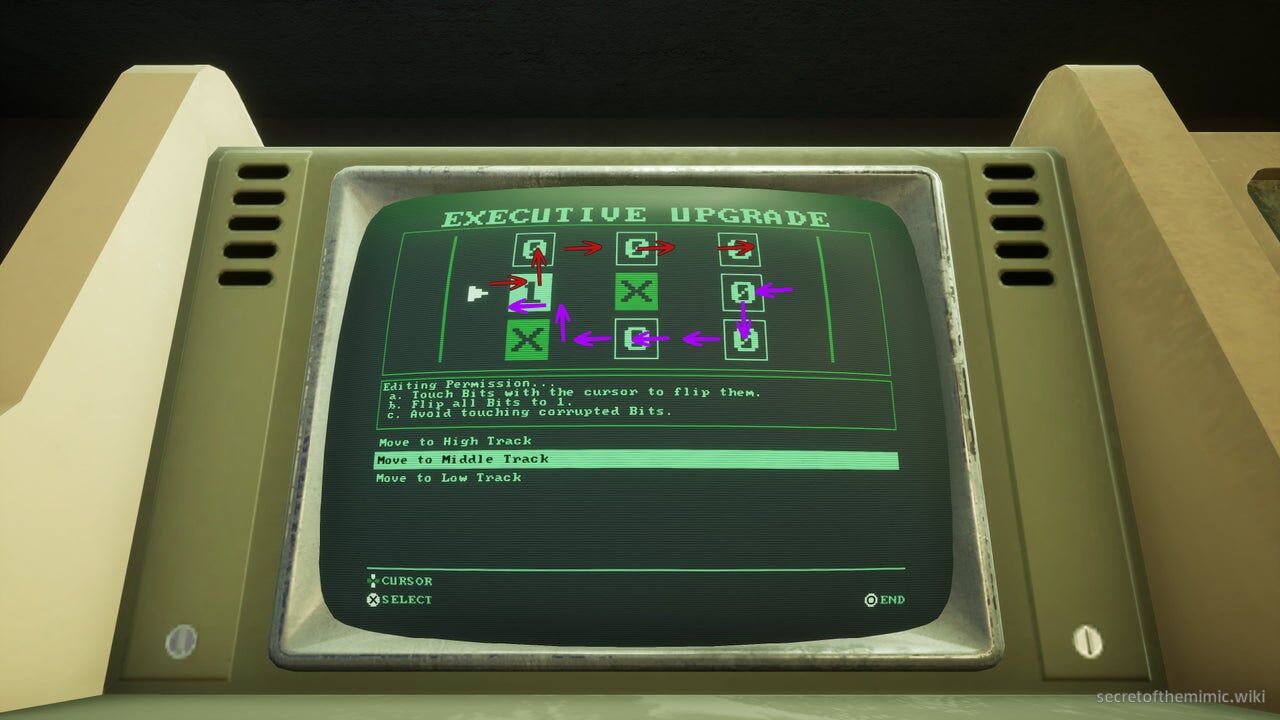
- When the cursor flips around, quickly switch it to the middle row so it turns the middle tile on the right-hand side to a 1.
- Then, shift it to the low track while it's still on the right-hand side to turn the bottom right-hand tile to a 1 as well.
- Let it move through the low track central tile.
- Then, while the cursor is midway through its journey between the centre and the left-hand side of the grid, switch it to the middle track so it turns the middle tile on the left back into a 1.
I've drawn another diagram above to make this clearer. The red arrows indicate where you should move when the cursor is moving right, and the purple arrows indicate where you should move when the cursor is moving left.